Omnipod® 5:
Pairing the FreeStyle Libre 3 Plus Sensor
How do I pair my FreeStyle Libre 3 Plus sensor with my Omnipod 5 System?
Learn how to pair your FreeStyle Libre 3 Plus sensor to your Omnipod 5 System.
Note: All sensor management will be performed through the Omnipod 5 app, including setting up and responding to alarms.
Step 1: Select FreeStyle Libre 3 Plus as your sensor
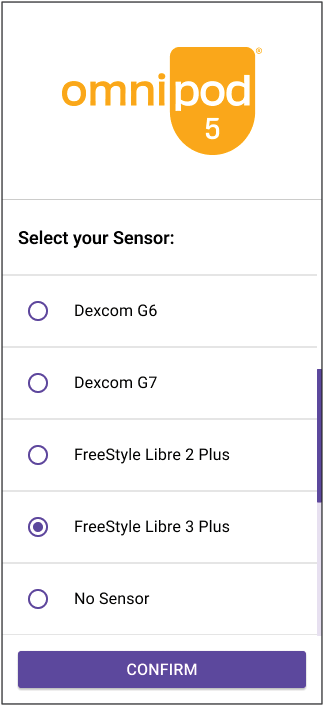
- From first-time setup, select FreeStyle Libre 3 Plus
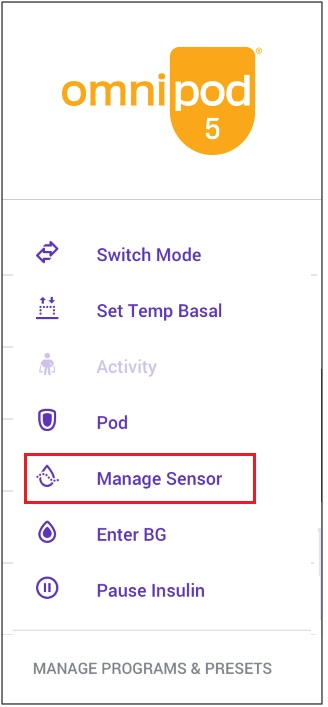
- From Home screen, tap Menu button. Tap Manage Sensor
Step 2: Review your sensor settings
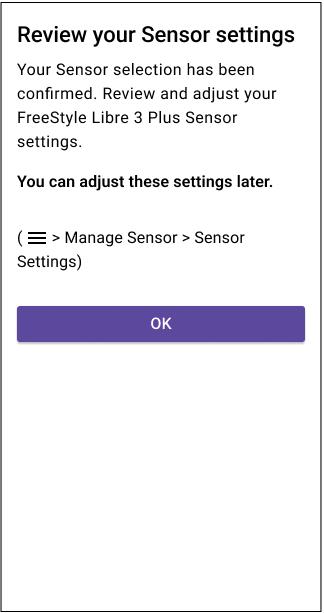
- Review or adjust your Low Glucose, High Glucose, Missed Sensor Values settings, and volume preferences
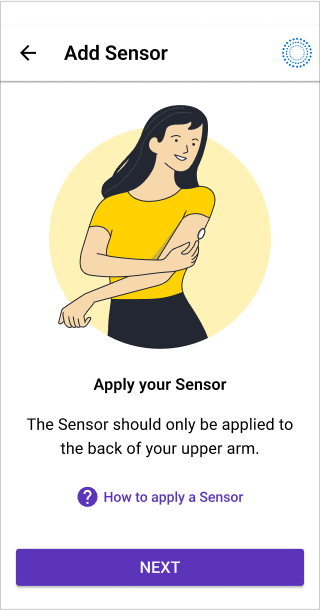
Step 3: Apply your FreeStyle Libre 3 Plus sensor
- Apply your FreeStyle Libre 3 Plus sensor by following the on-screen instructions
- Tap How to apply a Sensor if you need help. See below for Pod placements for optimal line of sight
Pod & Sensor Placement Examples
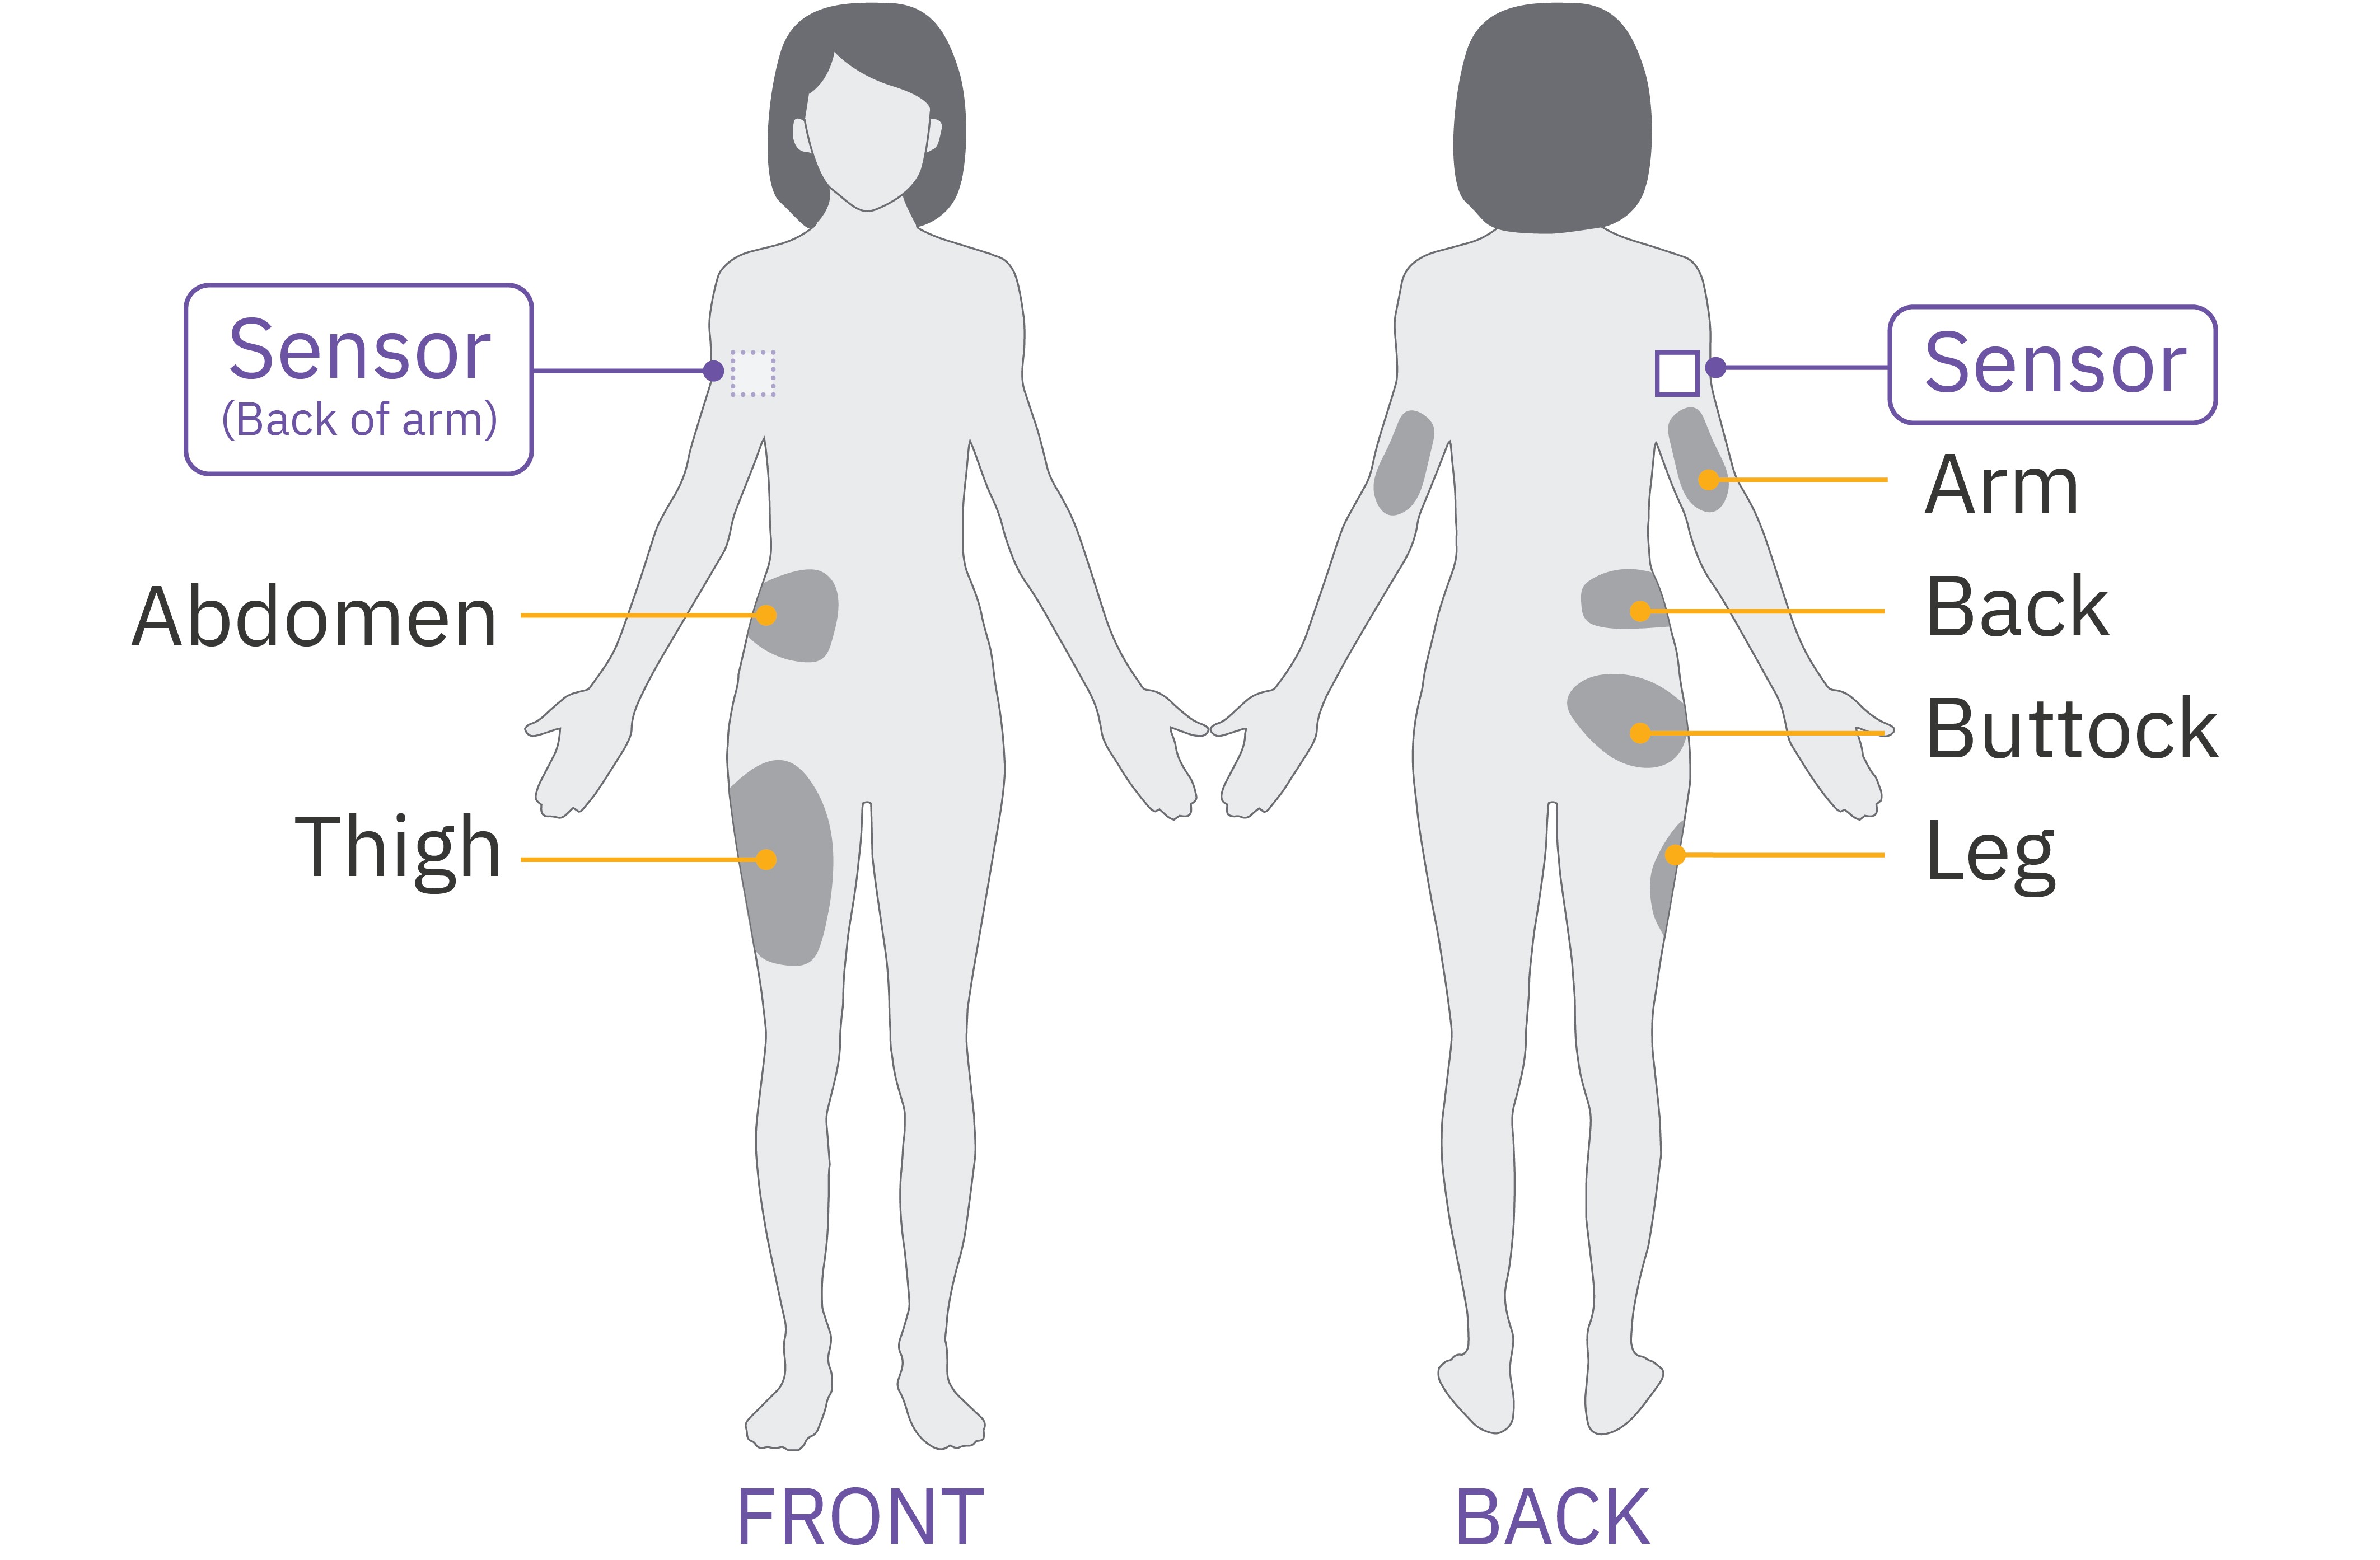
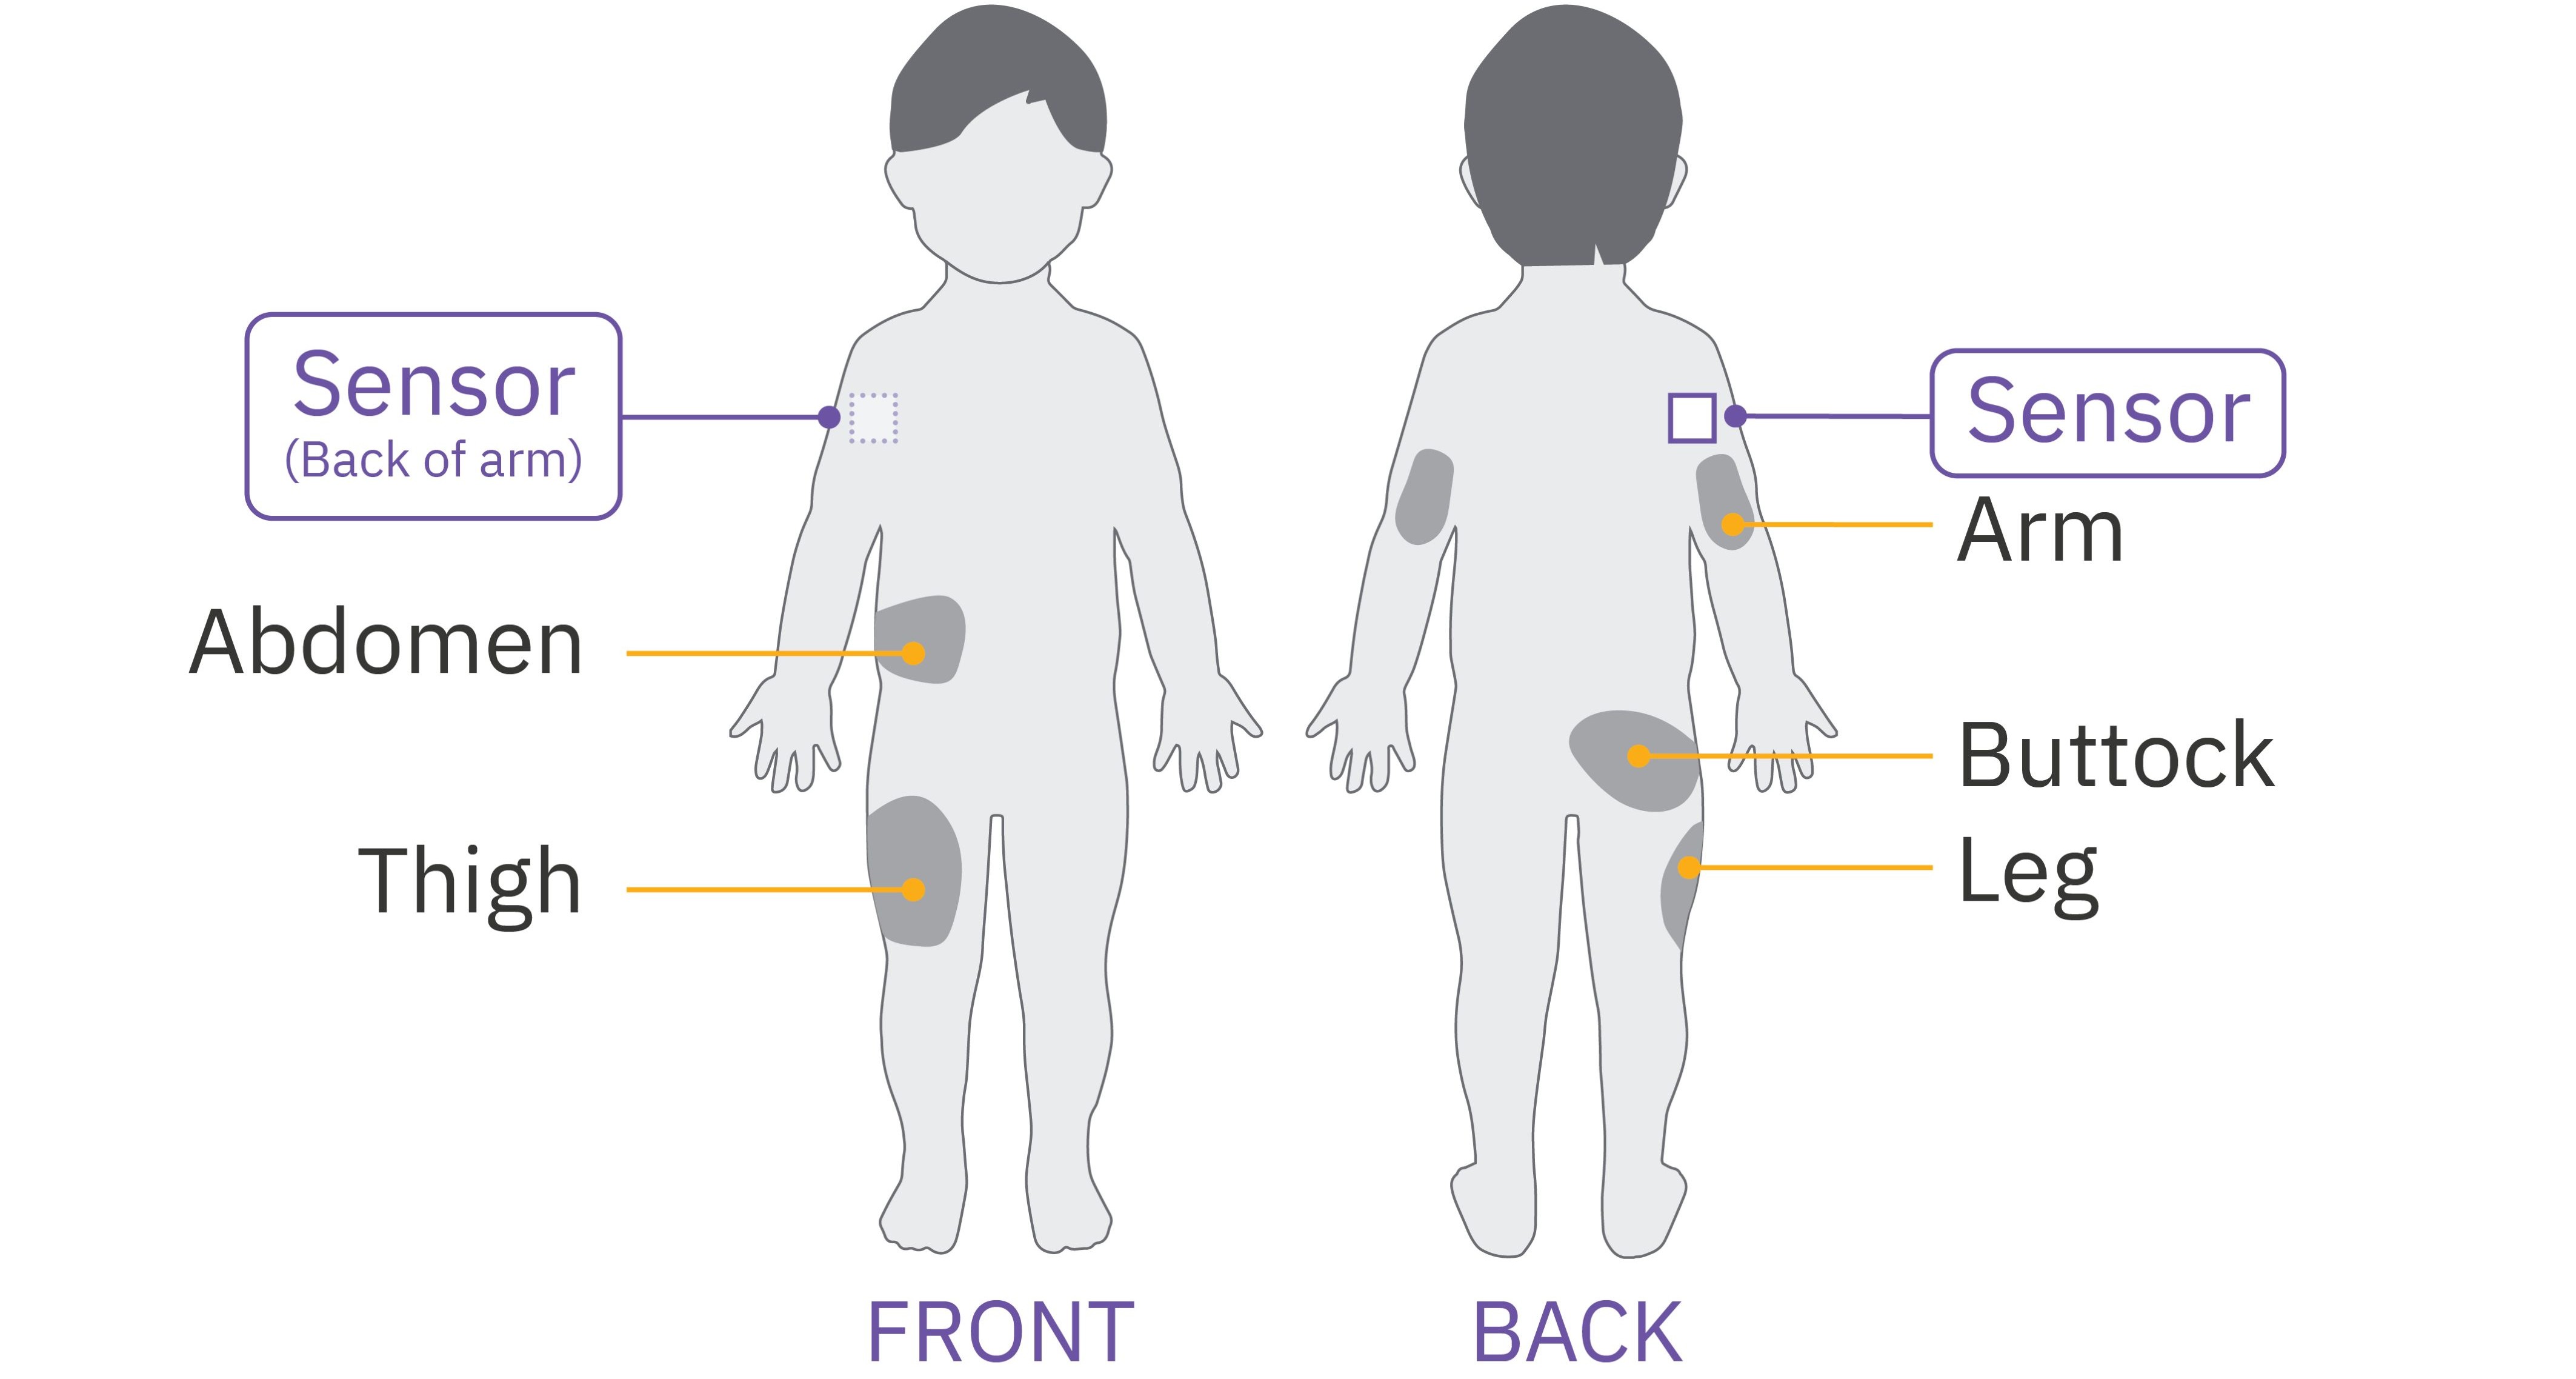
Consider these Pod placements to find the locations that work best for your body for optimal line of sight to your sensor*:
- On the same arm as sensor
- Same side, abdomen
- Same side, lower back (adult only)
- Same side, thigh
- Same side, upper buttocks
- Opposite side, back of the arm
*Illustration for example only. Please refer to sensor user guide for approved sensor placement and separation distances.
Step 4: Scan your sensor

- Tap SCAN SENSOR
- Place the back of your Controller up to the sensor and scan it. The lower third of the Controller should almost touch the sensor
- Switch back to Automated Mode. Your app will show Automated Mode: Limited until connection is complete, which can take up to 20 minutes
If you need additional support, call Omnipod Product Support at 1-800-591-3455.