Getting Started on Omnipod® 5

Omnipod 5 Onboarding
Before you get started on Omnipod 5, you must complete your Omnipod 5 onboarding online before your Omnipod 5 product training. Create an Omnipod ID and complete the consent screens, where we provide you with information about how your personal data is processed. When you activate the Controller for the first time, you must enter your Omnipod ID and password.
Step 1 Creating an Omnipod® ID
After your order is processed by Insulet, you will receive a “Complete Your Omnipod® 5 Onboarding Now” email. Open the email and select Start Omnipod® 5 Onboarding and log in with your or your dependent’s existing Omnipod ID.
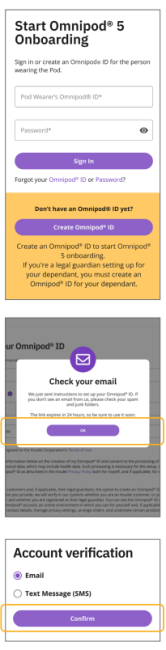
If you did not receive an email:
- Go to www.omnipod.com/setup or scan this QR code:
- Select your country.

3. If you do not have an Omnipod ID
a) Select Create Omnipod® ID.
b) Fill in the form with your information, or the or the details of the dependant if you are acting as a parent or legal guardian. You will receive an email from Insulet to complete setting up your account.
c) Open the “Omnipod® ID set up nearly complete” email. Make sure you check your Junk or Spam folder if you do not see the email.
d) Select Set Up Omnipod® ID in the email. The link is valid for 24 hours.
e) Follow the on-screen instructions to review your information and set up your ID and password.
f) Follow the on-screen instructions to set up two-factor authentication by email (required) or SMS text message (optional).
g) Enter the verification code sent by email or SMS text message to complete account set up.
h) Log in with your new Omnipod ID and password.
i) Follow the on-screen instructions to verify your account if logging in from a different device.
OR
If you already have an Omnipod ID
- Log in with your Omnipod ID and password.

Parents and Carers Make sure you create the Omnipod ID on behalf of the customer in your care. Select I am a legal guardian for a dependent who will wear Omnipod® 5 at the top of the Create Omnipod® ID form.
The Omnipod ID:
- should be unique
- should be at least 6 character (e.g !#£%&*.@)
- should not contain blank spaces
Passwords:
- should be at least 8 character long
- should include upper case, lower case and number.
- should not include your (or the customer's) first name, last name, or Omnipod ID
- should only contain the following special characters (e.g !#£%&*.@)
Reading and validating Data Privacy consent
At Insulet, the safety and security of our users and products is paramount in everything we do. We are dedicated to making the lives of people with diabetes easier and simplifing diabetes management. Insulet respects the privacy of every one of our customers and is committed to the protection of their personal information. We have dedicated teams that are focused on keeping customer information safe from unauthorized access.
After setting up your account, you must review and consent to the following data privacy policies:
- Omnipod 5 Terms & Conditions – Required.
- Omnipod 5 Consents – Each type of consent must be agreed to individually:
- Product Use – Required.
- Data Privacy Introduction – Required.
- Product Research, Development and Improvement – Optional
- Select Skip and Continue to opt-out.
- If you select Agree and Continue, a few optional questions display
Linking your Omnipod account with a Glooko® account
Glooko is the Omnipod 5 data management platform that enables you to:
- See your glucose and insulin data
- Share your data with your healthcare provider to support informed system adjustments.
We recommend that you link your Omnipod ID to your Glooko account. If you do not have a Glooko account you can create one during setup by following these steps.
Ask your healthcare provider for their clinic’s ProConnect code to share your diabetes data

Prepare for your Training Day
In preparation for starting on Omnipod 5 please follow guidance from your HCP regarding any changes to current therapy, including any insulin therapy adjustment. You must be trained by your HCP and/or Insulet Clinical team before you start on Omnipod 5.
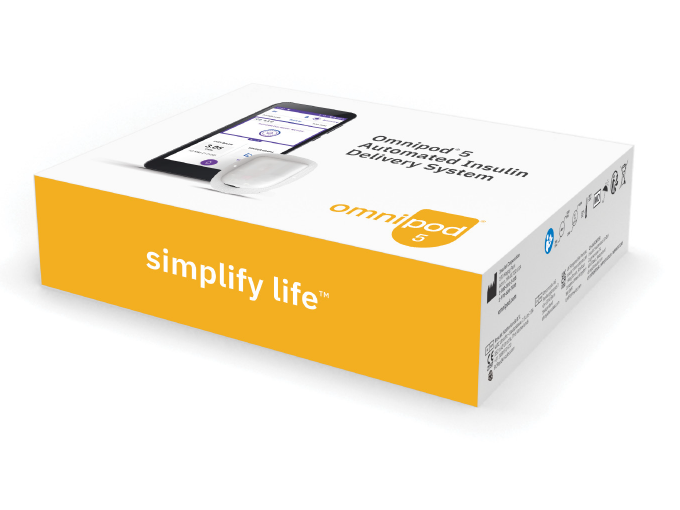
Omnipod 5 Starter Kit
If you are receiving your training at home, we will send you the Omnipod 5 Starter kit and box(es) of Omnipod 5 Pods. You will also need a vial of the rapid acting insulin prescribed by your HCP.
OR
- If you are being trained in the hospital, your Omnipod 5 Starter kit and box(es) of Omnipod 5 Pods will be there. Remember to take a vial of the rapid acting insulin if you are using this already.
If you are expecting delivery of your Omnipod 5 Starter kit and Pods, and have not received these within 3 days of your scheduled training, please contact Customer Care.
Dexcom sensor
- Please come to training wearing an active Dexcom G6 or Dexcom G7 sensor using the Dexcom app on a compatible smartphone and ensure your Dexcom receiver is switched off.* FreeStyle Libre 2 Plus sensor
FreeStyle Libre 2 Plus sensor
- Please ensure your healthcare provider has provided you with a prescription for FreeStyle Libre 2 Plus sensors.
- If you are currently using a FreeStyle Libre sensor, continue to wear this sensor when you attend your Omnipod 5 training.
- Please bring a new, unopened FreeStyle Libre 2 Plus sensor with you to the Omnipod 5 training.*
Insulin
- Remember to bring a vial of rapid-acting insulin† to your training
Additional Resources
*The FreeStyle Libre 2 Plus and the Dexcom G6 or G7 Sensors are prescribed separately.
The Dexcom G6 Sensor must be used with the Dexcom G6 mobile app. The Dexcom G6 receiver is not compatible.
† NovoLog®/NovoRapid®, Humalog®, Trurapi®/Truvelog/Insulin aspart Sanofi®, Kirsty®, and Admelog®/Insulin lispro Sanofi® are compatible with the Omnipod 5 System for use up to 72 hours (3 days)